Ingredients:
Cake:
3/4 Cup Sugar
1 Cup Water
9 Tablespoons of Unsalted Butter, diced
18 Oz of bittersweet or semisweet chocolate, chopped
6 Large Eggs
Ganache:
1 Cup Heavy Whipping Cream
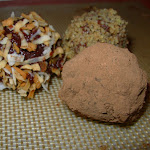
8 Oz of bittersweet or semisweet chocolate, chopped
Instructions:
For the cake:
Preheat oven to 350*F. Butter 10-inch-diameter springform pan. Line bottom of pan with parchment round; butter parchment. Wrap 3 layers of heavy-duty foil around outside of pan, bringing foil to top of rim. Combine 1 cup water and sugar in small saucepan. Bring to boil over medium heat, stirring until sugar dissolves. Simmer 5 minutes. Remove from heat. (You are basically making a simple syrup. I wonder why the ratio isn't 1:1...)
Melt the butter in double boiler. Add chocolate and whisk until smooth. Whisk sugar syrup into chocolate; cool slightly. Add eggs to chocolate mixture and whisk until well blended. Pour batter into prepared pan. Line the roasting pan with paper towels and then place cake pan in large roasting pan. Add enough hot water to the roasting pan to come halfway up sides of cake pan.
Bake cake until center no longer moves when pan is gently shaken, about 50 minutes. Remove from water bath; transfer to rack. Cool completely in pan.
For ganache:
Bring whipping cream to simmer in small saucepan over medium heat. Remove from heat. Add chocolate and whisk until smooth. Pour over top of cake still in pan. Gently shake pan to distribute ganache evenly over top of cake. Refrigerate cake in pan until ganache is set, about 2 hours. DO AHEAD: Can be made 2 days ahead. Cover and keep refrigerated.
Run knife around pan sides to loosen cake; release sides. Cut cake into wedges and serve with whipped cream.
** I have altered the instructions slightly. The original recipe did not call for the double boiler. However, in the books I have been reading they explain that the double boiler is safer and keeps the consistancy of the temperature more than the direct heat and all of their similar recipes direct the cook to use such methods.